 Skip to content
Does PPF Yellow Over Time? What San Antonio’s Sun Does to Your Film
Key Takeaway The question shows up constantly in our shop on Mainland Drive. A customer pulls up with a three-year-old film that looks more yellow than a school bus, and they want to know what went wrong. The frustrating part is that this was completely avoidable. Understanding what causes PPF to yellow, and why San Antonio speeds up the process, helps you make smarter decisions before installation. Why Does Paint Protection Film Turn Yellow? PPF yellowing comes down to chemistry. The film itself is made from thermoplastic polyurethane (TPU), and not all TPU is created equal. There are two main types: TPU Type Chemical Structure UV Stability Common Use Aromatic TPU Contains benzene rings Poor, yellows quickly Budget films Aliphatic TPU No benzene rings Excellent, resists yellowing Premium films When UV rays hit aromatic TPU, they trigger a chemical reaction called photo-oxidation. The benzene rings in the polymer structure oxidize and form compounds called quinoid structures. These are the same reddish-yellow molecules that make old plastic toys turn that sickly amber color over time. Aliphatic TPU skips this problem entirely because the molecular structure has no benzene rings to break down. It is inherently UV-stable. The adhesive layer also plays a role. Older PPF designs used adhesives that react with oxygen over time, creating oxidation that rises through the film as a yellow tint. This type of discoloration cannot be polished away because it starts from underneath, not on the surface. How San Antonio’s Climate Accelerates PPF Degradation Living here means accepting certain realities about sun exposure. The numbers tell the story clearly. San Antonio UV Index Data: Sunshine Statistics: For context, a UV index of 8 or higher means unprotected skin can burn in under 15 minutes. Your car sits in that same radiation for hours at a time. Research suggests PPF can yellow up to 40% faster when subjected to intense sunlight versus being kept in shaded areas. The heat compounds everything. San Antonio regularly sees temperatures above 100°F in summer, and elevated heat accelerates the chemical reactions that cause discoloration. A car parked in direct sun can have surface temperatures exceeding 150°F. That level of sustained heat stress affects adhesive integrity and film stability. It is not just summer either. Even our winters maintain moderate UV exposure. The UV index in January still reaches 5, which is considered moderate. Your film gets no real break from radiation throughout the year. The Difference Between Surface Staining and True Yellowing Here is something that trips people up. Not every yellow tint on your PPF means the film has failed. Surface contamination looks like yellowing but can often be cleaned. Road grime, mineral deposits from hard water, tree sap residue, and environmental pollutants can all create a yellowish haze on the film surface. A proper wash with pH-neutral soap, or in stubborn cases, a detail correction, can remove this. True yellowing happens within the film material itself. This occurs when UV exposure breaks down the polymer structure or when oxidation affects the adhesive layer. No amount of washing or polishing fixes this because the discoloration is embedded in the film. How to tell the difference: Look at areas that receive less sun exposure, like door jambs or sections under trim. If those areas look noticeably clearer than your hood and roof, you are probably dealing with true UV-induced yellowing. If the film looks uniformly hazy everywhere, contamination is more likely. What Premium Film Gets Right The film brands that hold up in our climate share common characteristics. At Alamo Auto Aesthetics, we install STEK DYNOshield as our primary PPF because it checks every box for San Antonio conditions. UV Inhibitors: Premium films contain additives that absorb UV radiation before it can damage the polymer. These inhibitors act like sunscreen for the film itself. Budget films often skip this step because the additives increase manufacturing costs. Aliphatic TPU Base: As mentioned, this is the foundation. Films made with aliphatic isocyanates (like HDI or H12MDI) do not have the molecular weakness that causes yellowing. Some manufacturers blend in cheaper aromatic TPU to cut costs, which compromises the entire film. Multi-Layer Construction: Quality PPF typically includes a clear coat layer on top that provides additional UV protection and self-healing properties. A contamination barrier prevents dirt and oils from penetrating the film. The adhesive layer uses stable formulations that resist oxidation. Warranty Backing: This one matters. A manufacturer willing to offer a 10-year warranty against yellowing has confidence in their product chemistry. We back our PPF installations with a 10-year warranty covering yellowing, cracking, peeling, and adhesive failure for exactly this reason. Signs Your PPF Is Starting to Yellow Catching yellowing early does not fix the problem, but it helps you plan. Here is what to watch for. Visual Indicators: Comparison Method: Park next to a similar vehicle with newer film, or look at reference photos from your installation day. Sometimes yellowing happens gradually enough that you do not notice until you have something to compare against. Timeline Expectations: Film Quality Expected Yellowing Timeline Warranty Typical Budget PVC-based 1 to 2 years None or 1 year Mid-range TPU 3 to 5 years 3 to 5 years Premium Aliphatic TPU 7 to 10+ years 10 years If your film shows yellowing within the first 2 years, something went wrong. Either the film quality was poor, the installation was compromised, or there was contamination trapped during application. Any reputable installer should address this under warranty. If you are seeing signs of improper installation, yellowing might be the least of your concerns. Prevention Strategies That Actually Work You cannot stop UV exposure entirely unless you garage your car permanently, which defeats the purpose of owning it. But you can minimize damage through smart habits. Parking Considerations: Strategic parking makes a measurable difference. Covered parking, garage storage, or even parking in the shade of a building during peak UV hours (10 AM to 4 PM) reduces cumulative exposure. If indoor parking is not available, a quality car
PPF Edges Lifting: Why It Happens and How to Fix It Before It Gets Worse
Key Takeaways You spent good money on paint protection film expecting years of trouble free protection. Then one day you notice a corner of the film near your headlight starting to pull away from the paint. Maybe the edge along your hood has a visible gap where dust is collecting. Here’s the thing though. Catching PPF edge lifting early can save you from a full panel replacement. This guide covers why edges lift, how to spot early warning signs, what you can fix yourself, and when it’s time to bring in a professional. What Does PPF Edge Lifting Look Like? Edge lifting happens when the perimeter of your paint protection film starts separating from the vehicle’s surface. It typically begins at corners, along straight edges near body panel gaps, or around curves where the film was stretched during installation. Early stage lifting might look like a slight shadow along an edge. You might not even notice it unless you run your finger along the film’s border. More advanced lifting creates an obvious ridge or flap that catches dirt, making the problem increasingly visible on lighter colored vehicles. Leading edges on hoods, front bumpers, and fenders experience the most stress from wind, debris, and temperature changes. These areas tend to lift first when something goes wrong. Why PPF Edges Lift: The Main Causes PPF doesn’t randomly peel off your car. There’s always an underlying reason. Inadequate Surface Preparation This is the single biggest reason films fail early. PPF adhesive needs a perfectly clean surface to bond properly. Any wax residue, polish oils, or invisible road film left on the paint prevents the adhesive from gripping. Professional installers spend considerable time prepping surfaces with clay bar treatment, isopropyl alcohol wipes, and sometimes polishing. Skip this step and the film might look fine initially, but give it a few weeks of temperature cycling and that edge starts lifting. Poor Heat Sealing During Installation Every PPF edge needs to be heat sealed using a heat gun to activate the adhesive and create a permanent bond. Edges that weren’t properly heated will eventually lift because the adhesive never fully cured to the surface. You might not notice for weeks or months, but the bond was never strong enough to handle real world conditions. Low Quality Film and Adhesive Budget films use cheaper adhesives that don’t hold up over time. They might look identical to premium films when freshly installed, but differences show up 6 to 12 months later when edges start failing. Premium films from manufacturers like STEK, 3M, KPMF, and Avery Dennison use adhesive technology designed to flex with temperature changes while maintaining a strong bond. Overstretching on Curved Surfaces When installers over stretch film around tight curves or compound bends, they create stored mechanical tension that constantly pulls against the adhesive bond. Eventually that tension wins and the stretched areas start releasing from the edges inward. Friction From Trim Pieces Film edges placed too close to rubber trim pieces or weather stripping experience repeated friction every time those parts move. Over time this constant rubbing breaks the adhesive bond. Temperature Extremes Your car might sit in 100°F direct sunlight during a San Antonio summer afternoon, then cool down 30 degrees overnight. This thermal cycling creates stress at every edge and accelerates any existing weakness in the bond. How to Spot Edge Lifting Early? The sooner you catch lifting, the better your options. Run your finger lightly along all film edges every few weeks checking for any ridge, bump, or area that feels like it’s catching your fingernail. Location Why It’s Prone to Lifting Hood leading edge Wind pressure, debris impact, engine heat Front bumper corners Stretch stress from curves Headlight edges Complex curves, heat from bulbs Mirror caps Wind buffeting at highway speeds Door edges Friction from seals Visual signs include shadow lines along film edges, visible gaps between film and paint, and dirt accumulation in a distinct line along any edge. Can You Fix PPF Edge Lifting Yourself? Minor edge lifting caught early, before dirt contaminates the adhesive, can sometimes be fixed at home. We’re talking about lifting less than an inch from the edge with no visible contamination underneath. What You’ll Need Step by Step DIY Fix 1. Clean the area using a microfiber cloth dampened with isopropyl alcohol. 2. Check under the lifted portion. Gently lift the edge just enough to inspect underneath. If you see embedded dirt or a visible dirt line, stop. That contaminated adhesive won’t bond again. Professional trimming or panel replacement is your only option. 3. Clean both surfaces if the underside looks clear. Use a Q tip dampened with isopropyl alcohol to clean both the adhesive and exposed paint surface. Let it evaporate completely. 4. Apply heat using a hair dryer on medium, held 6 to 8 inches from the film. You want the film warm to the touch but not too hot to handle. 5. Press firmly while the area is still warm, using your thumb or a microfiber wrapped finger. Hold pressure for 30 seconds. Work from the center outward to push out trapped air. 6. Let it cure for 24 to 48 hours. Avoid washing or exposing the repaired area to rain. When DIY Won’t Work Don’t attempt DIY repairs if: Professional Repair Options When DIY isn’t viable, here’s what shops typically offer. Edge Trimming: For minor but contaminated lifting, an experienced installer can carefully trim away the compromised edge using a razor blade. This creates a new clean edge set slightly inward from the original position. Partial Panel Replacement: Sometimes the most cost effective solution is removing the lifted section and installing new film over just that portion. Done properly, the seam can be placed along a natural body line where it’s barely visible. Full Panel Replacement: When lifting has spread significantly or the existing film shows other issues like yellowing, full panel replacement makes more sense. This is often covered under warranty if lifting resulted from installation defects. Preventing
How Dark Can Your Window Tint Legally Be in Texas? Understanding Tint Laws
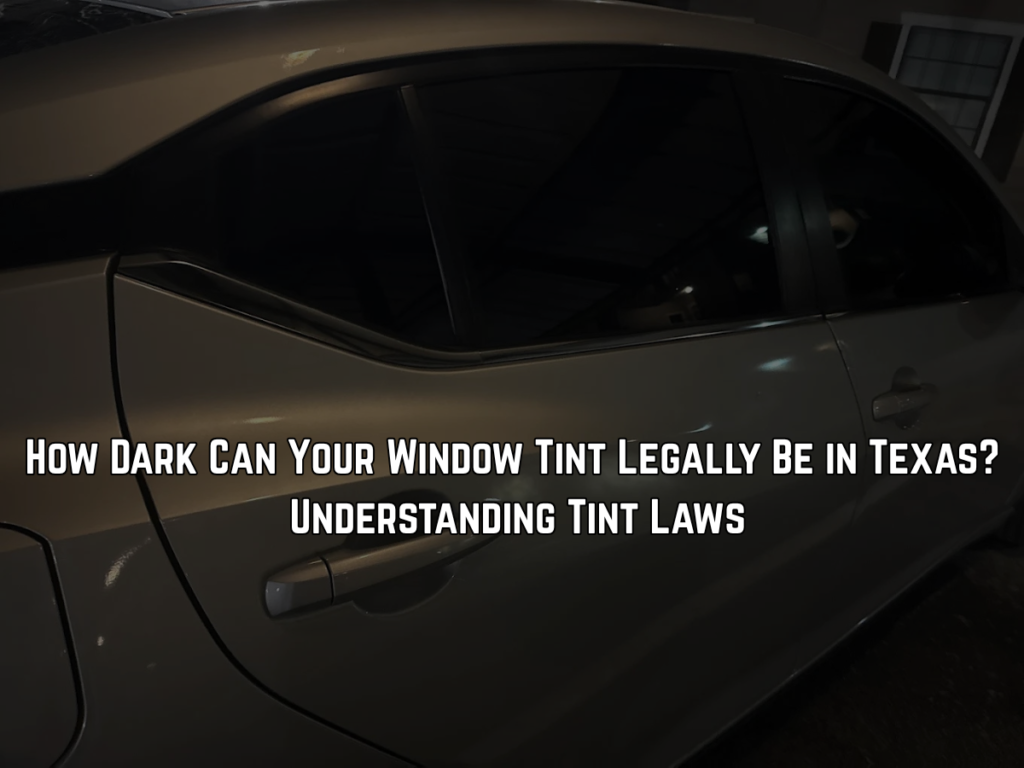
Texas summers hit different. Between the brutal sun beating down on your dashboard and the constant squinting while driving down I-10, window tinting in San Antonio becomes more necessity than luxury. But before you go for the darkest shade you can find, you need to know about Texas Window tinting laws before. Quick Answer: Texas Window Tint Legal Limits Window Location Legal VLT Requirement Front side windows (driver and passenger) 25% VLT minimum Back side windows Any darkness allowed Rear window Any darkness allowed (with dual side mirrors) Windshield 25% VLT above AS-1 line or top 5 inches only Key Takeaways: What Does VLT Actually Mean? VLT stands for Visible Light Transmission. This percentage tells you how much visible light passes through your window tint and glass combined. The math is straightforward: a lower percentage means darker tint. Here’s how different VLT levels actually look: VLT Percentage Appearance Light Blocked 70% VLT Nearly clear, slight tint 30% 50% VLT Light tint, easily see inside 50% 35% VLT Medium tint, some privacy 65% 25% VLT Moderate tint (Texas front limit) 75% 20% VLT Dark tint, hard to see in 80% 5% VLT “Limo tint,” nearly blacked out 95% When a Texas law enforcement officer pulls you over, they can use a VLT meter to measure your window tint on the spot. These devices are accurate and the reading determines whether you’re legal or facing a citation. The 25% VLT standard for front windows exists primarily for two reasons. First, officers need to see inside vehicles during traffic stops for their safety. Second, drivers need adequate peripheral vision, especially at night or in low light conditions. Breaking Down Texas Tint Laws by Window Texas Transportation Code Section 547.613 establishes the specific requirements for sunscreening devices. The Texas Department of Public Safety enforces these standards through vehicle inspections and traffic stops. Front Side Windows (Driver and Passenger) This is where most people run into trouble. Texas requires front side windows to allow at least 25% of light transmission. That means your tint cannot be darker than 25% VLT when combined with the factory glass. Common questions about front window tint: Is 20% tint legal on front windows in Texas? No. 20% VLT is darker than the legal limit. You will fail inspection and risk citations. What about 30% tint? Yes, 30% VLT is legal because it allows more light than the 25% minimum requirement. Can I have 5% tint on the front? Not without a medical exemption. Standard vehicles cannot have front windows darker than 25% VLT. The front window restriction applies to all vehicle types in Texas. Whether you drive a sedan, truck, SUV, or van, the 25% VLT minimum stays the same. Back Side Windows Here’s where Texas gets more relaxed. Back side windows (those behind the driver and front passenger) are completely exempted from darkness regulations under the Texas Transportation Code. You can legally install: This flexibility makes sense. Rear passengers don’t need the same visibility requirements as the driver, and these windows don’t affect the driver’s ability to see the road ahead. Rear Window The rear window follows similar rules to the back side windows, but with one important condition. You can tint your rear window to any darkness level, including complete blackout, only if your vehicle has dual outside rearview mirrors. Most modern vehicles come with side mirrors on both sides, so this requirement rarely causes issues. However, if your vehicle lacks one of these mirrors, your rear window must meet the same 25% VLT standard as the front windows. Windshield Texas windshield tint rules are specific. You cannot tint the entire windshield, but you can apply a tint strip at the top. The requirements: One exception worth noting: clear UV protective film is allowed anywhere on the windshield without restriction. These films block harmful ultraviolet rays without reducing visible light transmission, so they don’t fall under the same regulations as tinted films. This is particularly useful for protecting yourself from UV exposure while maintaining full visibility. Reflectivity Rules in Texas Beyond darkness, Texas also regulates how reflective your window tint can be. Highly reflective or mirror-like tints create dangerous glare for other drivers and make it nearly impossible for officers to see inside vehicles. Texas limits reflectivity to 25% or less on all windows. This applies to: If your tint has a metallic or chrome appearance, it likely exceeds the reflectivity limit. Most quality automotive tints fall well within this requirement, but cheap metallic films or mirror tints will fail inspection. Prohibited Tint Colors Texas law prohibits specific tint colors on all vehicle windows: These colors are restricted because they can be confused with emergency vehicle lights or traffic signals. Stick to neutral shades like charcoal, gray, black, or smoke to stay compliant. The color restriction applies regardless of how light or dark the tint is. Even a very light red-tinted film would be illegal. What Happens If You Get Caught With Illegal Tint? Driving with illegal window tint in Texas carries real consequences. Law enforcement officers carry VLT meters and can measure your tint during any traffic stop. Fines and Penalties The financial hit depends on whether it’s your first offense: Offense Typical Fine Range First violation $100 to $200 Repeat violations Up to $275 or more Some jurisdictions issue “fix-it tickets” that give you a deadline to remove or adjust the illegal tint. If you comply and have the vehicle reinspected, you may avoid the full fine. Fail to comply, and you’re looking at additional penalties. Inspection Failure Texas requires annual vehicle safety inspections, and window tint is part of that inspection. If your front windows have less than 25% light transmission, your vehicle fails. No exceptions without a valid medical exemption. Failing inspection means you cannot legally register your vehicle until the issue is corrected. That creates a cascade of problems: expired registration, potential citations, and the cost of tint removal and reinstallation with legal film. Insurance Considerations While illegal tint doesn’t directly
Can Paint Protection Film Be Installed on a Used Car?
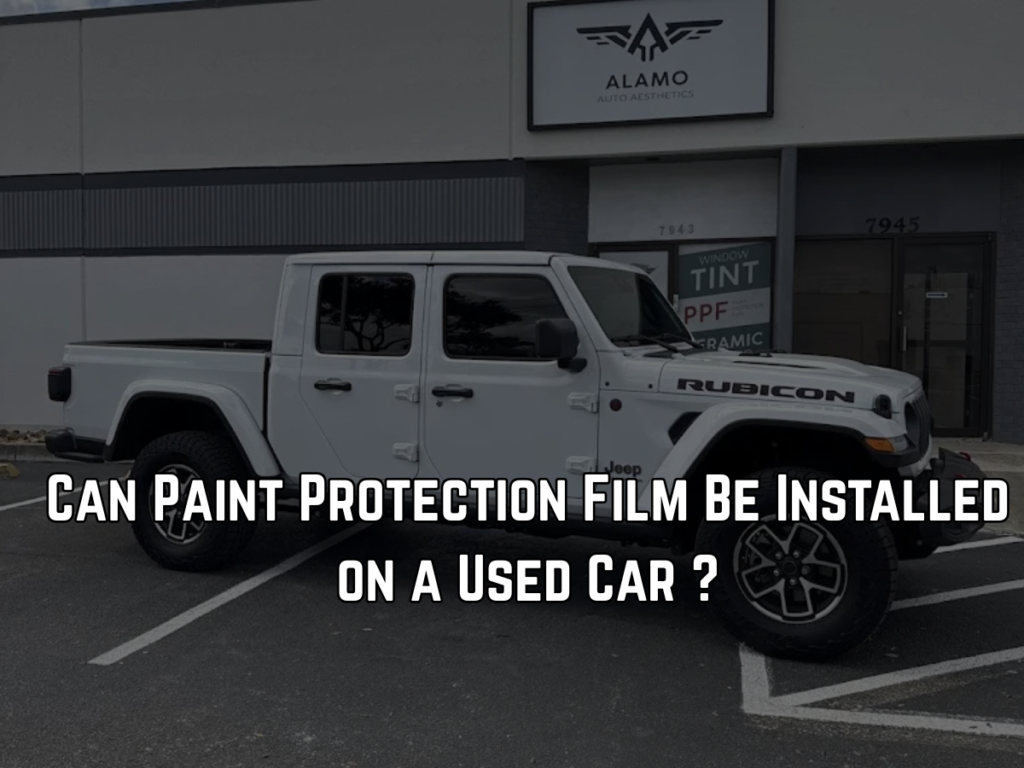
So you just bought a pre-owned vehicle. Maybe it’s a 2018 pickup truck with 60,000 miles, or perhaps you’ve had your sedan for five years and never got around to protecting the paint. You’re thinking about paint protection film to preserve what’s left of the finish, but you’re wondering if it’s too late. Does PPF only work on brand-new paint? Can it hide existing scratches and imperfections? Here’s the straight answer: Yes, PPF can absolutely be installed on used cars. But there’s a catch. The condition of your existing paint matters a lot, and some prep work is usually necessary before the film goes on. Key Takeaways Why People Think PPF Is Only for New Cars There’s a common misconception floating around that paint protection film is exclusively for brand new vehicles fresh off the dealership lot. This belief probably comes from a few places. First, dealerships heavily market PPF as an add-on for new car purchases. They catch buyers at the moment of maximum enthusiasm, when that showroom shine is still blinding. Second, most promotional images and videos show PPF being applied to pristine, untouched surfaces. That creates the impression that perfect paint is a requirement. But the reality is different. The protective film industry has evolved significantly over the past decade. Modern urethane films are designed to bond with clear coat surfaces regardless of the vehicle’s age. What matters isn’t how old your car is. What matters is the current state of the paintwork underneath. A 10-year-old car with meticulously maintained paint can be an excellent candidate for PPF. Meanwhile, a 2-year-old vehicle that’s been neglected, covered in swirl marks, and has oxidation starting to show might need serious work before protection makes sense. Understanding What PPF Actually Does Before diving deeper into whether your older paint qualifies, it helps to understand what paint protection film actually accomplishes. PPF is a thermoplastic urethane film that creates a physical barrier between your car’s paint and the outside world. It absorbs impacts from rock chips, gravel, road debris, and minor abrasions. Higher quality films also have self-healing properties, meaning light scratches in the film itself can disappear with heat exposure from the sun or warm water. Here’s the thing though: PPF is not a corrective product. It’s protective. The film preserves whatever is underneath it. Think of it like laminating a document. If the paper has wrinkles, stains, or tears before lamination, those imperfections get sealed in permanently. The same principle applies to your car. If your paint has swirl marks, light scratches, water spots, or minor oxidation when the film goes on, those defects become part of the finished result. The PPF will protect against future damage, but it won’t fix existing problems. This is exactly why paint correction becomes such an important step for used vehicles. The Paint Correction Factor Paint correction is essentially the process of removing surface imperfections from your clear coat through polishing and compounding. For used cars, this step often bridges the gap between “my paint looks okay” and “my paint looks incredible under PPF.” What Paint Correction Addresses Defect Type Can Be Corrected? Notes Swirl marks Yes Very common on used cars, usually from improper washing Light scratches Yes Surface scratches that haven’t penetrated the clear coat Water spots Usually Depends on whether etching has occurred Oxidation (mild) Yes Early stage oxidation responds well to polishing Bird dropping etching Sometimes Depends on severity and how long it sat Tree sap residue Yes Requires careful removal before polishing Deep scratches No Scratches through the clear coat need touch-up or respray Rock chips No Bare metal or primer showing requires paint touch-up Severe oxidation No Heavy oxidation often needs respray The goal of paint correction is to get your older paint as close to perfect as possible before the protective film locks everything in place. A skilled detailer uses varying levels of abrasive compounds and polishing pads to remove a microscopic layer of clear coat, taking the defects with it. This process does remove some clear coat material, so there are limits. A car that’s been polished heavily multiple times throughout its life may not have enough clear coat remaining for aggressive correction. This is something a professional can assess before starting work. Evaluating Your Paint’s Condition Not every used car needs the same level of preparation. Some vehicles are excellent PPF candidates with minimal prep, while others might need extensive correction or even panel resprays before protection makes sense. Signs Your Paint Is in Good Shape Your used car might be a straightforward PPF candidate if: If this describes your vehicle, you’re probably looking at light paint correction followed by PPF installation. The process would be similar to protecting a newer car. Signs Your Paint Needs Work First More preparation is likely needed when: These situations aren’t dealbreakers. They just mean more work is involved before the film can be applied properly. Understanding how paint correction works before ceramic coating applies similarly to PPF preparation. The goal is always the same: create a clean, smooth surface that the film can bond to. When PPF Might Not Make Sense There are scenarios where applying PPF probably isn’t the best use of money: In these cases, the money might be better spent on paint restoration first. Once the car has been properly resprayed or refinished, then PPF becomes viable again. The Preparation Process for Used Cars When a used vehicle comes in for PPF installation, the preparation process is more involved than it would be for a new car. Here’s what typically happens: Step 1: Thorough Inspection The vehicle gets examined under proper lighting to identify every defect. This includes checking for: This inspection determines the correction level needed and identifies any areas that might require touch-up before proceeding. Step 2: Decontamination Used cars accumulate bonded contaminants that regular washing doesn’t remove. Iron particles from brake dust embed themselves in the paint. Road tar sticks to lower panels. Industrial fallout and tree sap create bonded
Is It Normal for Window Tint to Look Hazy or Foggy After Installation?
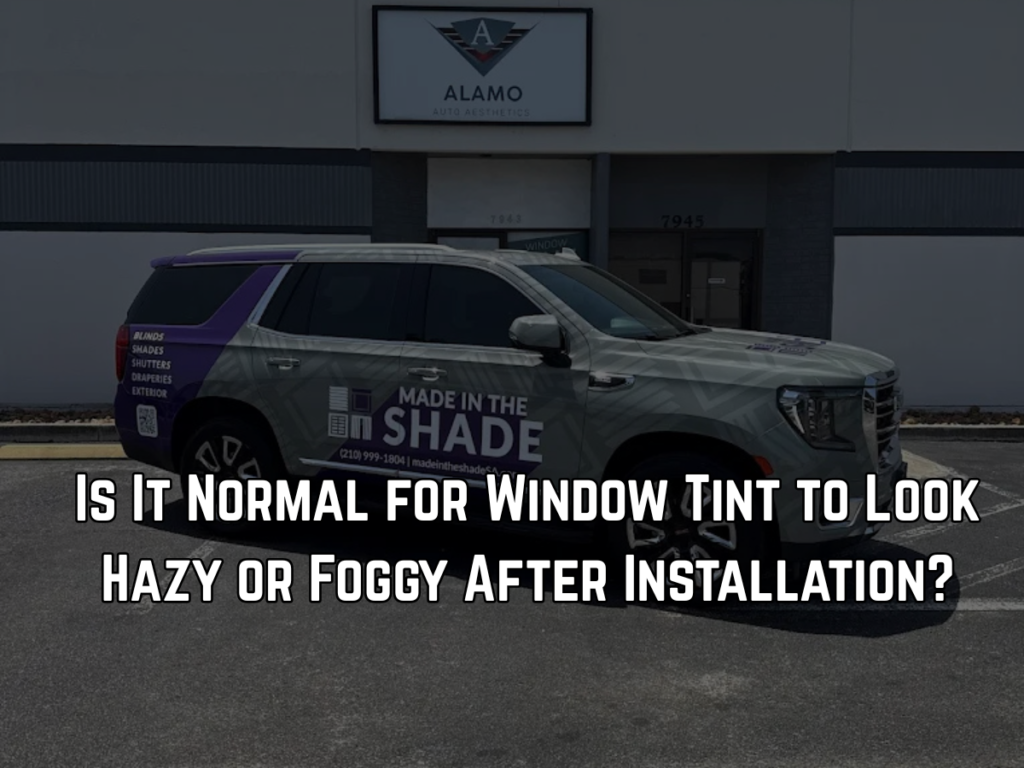
Quick Answer Yes, it is completely normal for window tint to look hazy, foggy, or milky immediately after installation. This cloudiness is caused by trapped moisture between the film and glass during the installation process. The haze will disappear naturally as the tint cures and the moisture evaporates through the porous film material. Curing time typically ranges from 3 to 5 days in warm, sunny weather to 2 to 4 weeks in cool or humid conditions. Small water bubbles may also appear during this period and will resolve on their own. The key is patience: avoid rolling down windows for at least 48 hours and don’t clean the tint for 60 days to allow proper adhesive bonding. You just left the shop with freshly tinted windows, excited about the sleek new look and promised UV protection. But when you inspect your vehicle, the windows look cloudy, hazy, or even milky instead of crystal clear. Naturally, concern sets in. Did the installer mess up? Is something wrong with the film? The short answer brings relief: this hazy appearance is not only normal but expected after professional window tinting installation. Understanding why this happens, how long it lasts, and what to expect during the curing process helps you avoid unnecessary worry and ensures your tint performs optimally for years. This guide explains the science behind post-installation haziness, distinguishes normal curing from actual problems, and provides the care instructions that protect your investment. Understanding the Window Tint Installation Process To understand why haziness occurs, you need to know how window tint is applied. The Wet Installation Method Professional window tinting uses a wet installation technique that creates the conditions for temporary cloudiness. Installation Steps: The installer thoroughly cleans the glass using a pH-balanced cleaning solution. Any dirt, oils, or residue prevents proper adhesion. After cutting the film to precise window dimensions, the installer sprays the glass surface with a soapy water solution. This slip solution allows the film to be positioned correctly before it adheres. The tint film is applied to the wet glass surface. At this point, there’s a significant amount of moisture between the film and the window. Using a squeegee, the installer pushes out as much water as possible, working from the center toward the edges. This removes the majority of the slip solution. Why Moisture Remains: Despite thorough squeegeeing, it’s physically impossible to remove 100% of the water. Microscopic amounts of moisture remain trapped between the film and glass. The film itself is slightly porous at a molecular level. This porosity serves an important purpose: it allows trapped moisture to escape through evaporation during the curing process. The squeegee removes perhaps 90% to 95% of the application solution, but that remaining 5% to 10% creates the hazy appearance you see after installation. The Chemical Bonding Process Window tint doesn’t just stick to glass like a sticker. The adhesive undergoes a chemical curing process. How Adhesive Works: Window film uses pressure-sensitive adhesive (PSA) engineered specifically for glass application. This adhesive requires time to form proper molecular bonds with the glass surface. During installation, the adhesive is activated by the moisture in the slip solution. As moisture evaporates, the adhesive transitions from a semi-liquid state to full bond strength. This curing process is gradual, not instantaneous. The adhesive continues strengthening its bond to the glass over days or weeks. Temperature and sunlight accelerate the curing process by promoting faster evaporation of trapped moisture. Why Window Tint Looks Hazy After Installation The cloudiness you see has specific, understood causes that are part of normal installation. Trapped Moisture Creates Fog Effect The primary cause of haziness is water vapor between the film and glass. The Visual Effect: Light passing through the window encounters the layer of moisture between glass and film. This moisture scatters light, creating the foggy or hazy appearance. Think of it like condensation on a bathroom mirror after a hot shower. The water droplets scatter light, making the mirror appear cloudy even though both the mirror and the water are transparent. The same principle applies to window tint. The glass is clear, the film is clear, but the moisture layer between them creates temporary opacity. Moisture Distribution: Immediately after installation, moisture is distributed relatively evenly across the window surface. This creates a uniform hazy appearance. As evaporation begins, you may see the haziness clear from the edges first (where evaporation occurs fastest) while the center remains cloudy longer. Some windows show a mottled pattern where certain areas clear faster than others. This is normal and related to variations in temperature, sunlight exposure, and film thickness. Small Water Bubbles Are Normal In addition to general haziness, you’ll likely see small bubbles or water pockets under the film. Water Bubbles vs. Air Bubbles: Water bubbles appear as small, irregularly shaped pockets that may shift slightly in position. These are caused by trapped moisture that hasn’t yet evaporated. They’re completely normal and will disappear during curing. Air bubbles are perfectly round, consistent in size, and don’t change position. These indicate improper installation where air was trapped during application. Air bubbles don’t resolve on their own. What’s Normal: Small water bubbles scattered across the window surface, particularly near edges or in the corners, are part of the curing process. These bubbles may seem to multiply or change size during the first few days as moisture redistributes before evaporating. Water bubbles typically range from pinpoint size to approximately 3 to 5 millimeters in diameter. Larger bubbles warrant closer inspection. When to Be Concerned: If bubbles are perfectly round, uniform in size, and arranged in patterns (often following squeegee stroke lines), these may be air bubbles from poor installation. Bubbles larger than a dime (approximately 18 millimeters) that don’t show signs of shrinking after 10 to 14 days should be evaluated by your installer. Bubbles that grow larger over time rather than shrinking indicate adhesive failure or installation problems. Normal Curing Timeline: What to Expect Understanding the typical curing timeline helps you distinguish normal progress
Can PPF Be Removed Without Damaging Factory Paint? Guide
Quick Answer Yes, paint protection film (PPF) can be removed without damaging factory paint when done correctly. The key factors are using controlled heat (heat gun positioned 3 inches away), peeling at a 45-degree angle, and working slowly on small sections. Film age dramatically affects removal difficulty: newer PPF (1 to 5 years old) peels cleanly in large pieces, while older film (5 to 10+ years) becomes brittle and requires significantly more time. Factory paint is much more durable during removal than aftermarket paint jobs, which are vulnerable to peeling. Professional removal eliminates risk but DIY removal is possible with proper technique, patience, and the right tools. Vehicle owners who invested in paint protection film eventually face a decision: when and how to remove it. Whether the film has reached the end of its 5 to 10 year lifespan, shows yellowing or peeling, or you simply want to refresh the protection, removal becomes necessary. The concern is legitimate. You installed PPF to protect your paint. The last thing you want is for the removal process to damage what you worked so hard to preserve. This guide explains exactly how PPF removal works, what determines whether paint stays pristine, and how to avoid the common mistakes that cause damage. Understanding Paint Protection Film Adhesive Systems Before discussing removal, you need to understand how PPF bonds to your vehicle’s paint. How PPF Adheres to Paint Paint protection film uses pressure-sensitive adhesive (PSA) technology. This adhesive bonds to paint through a combination of mechanical and chemical adhesion. The Bonding Process: During installation, the adhesive flows into the microscopic texture and imperfections of your clear coat. This creates mechanical interlocking at a microscopic level. Simultaneously, the adhesive forms weak chemical bonds with the clear coat surface. These bonds are strong enough for permanent adhesion during use but designed to release cleanly during proper removal. The adhesive is specifically formulated to remain removable for years. Unlike permanent adhesives that form irreversible bonds, PPF adhesive maintains its ability to release from the clear coat. What Makes PPF Removable Designed for Removal: Quality PPF brands like XPEL, 3M, and SunTek engineer their adhesives with specific properties: Cohesive strength: The adhesive holds together as a unified layer. When pulled correctly, the entire adhesive layer releases together rather than leaving residue. Release properties: The bond between adhesive and clear coat is weaker than the cohesive strength of the adhesive itself. This ensures the adhesive pulls away from paint cleanly. Temperature activation: Heat softens the adhesive, dramatically reducing its bond strength and making removal easier. Aging characteristics: Quality adhesives are designed to remain removable even after years of UV exposure and weather cycling. Film Age and Adhesive Changes The age of your PPF fundamentally changes the removal experience. Film Aged 1 to 5 Years: The film remains pliable and elastic. Adhesive retains designed release properties. Removal typically proceeds smoothly with large pieces peeling off cleanly. Minimal adhesive residue remains on the paint. Total removal time for a full front end: 2 to 4 hours. Film Aged 5 to 10+ Years: UV exposure causes the urethane film to become brittle and lose elasticity. The film fractures into small pieces during removal instead of peeling in sheets. Adhesive may have bonded more strongly over time, especially if exposed to extreme heat. Significantly more adhesive residue remains after film removal. Total removal time for a full front end: 6 to 12 hours or more. This age-related difference is the single biggest factor determining removal difficulty. Why Factory Paint Rarely Gets Damaged The good news: factory automotive paint is remarkably durable during PPF removal when proper technique is used. Factory Paint Construction Modern factory paint consists of multiple layers applied in carefully controlled conditions: Paint System Layers: E-coat primer: Electrostatically applied corrosion protection bonded directly to metal. This layer is extremely durable. Primer surfacer: Fills imperfections and provides smooth base for color. Base coat: Contains the actual color pigments. Clear coat: 1.5 to 3 mils (40 to 75 microns) thick protective layer. This is what PPF adheres to. Factory Application Process: Paint is applied robotically in dust-free environments at precisely controlled temperatures. Each layer is cured at high temperatures (often 250 to 350°F) to achieve maximum hardness and adhesion. The clear coat is fully cured and bonded to underlying layers before the vehicle leaves the factory. Why Factory Paint Resists Removal Damage Proper Curing: Factory paint has cured for months or years before PPF installation. The layers are fully hardened and bonded. Strong Interlayer Adhesion: The bond between clear coat and base coat is significantly stronger than the bond between PPF adhesive and clear coat. Uniform Thickness: Factory clear coat has consistent thickness across all panels. There are no thin spots vulnerable to damage. Quality Control: Factory paint undergoes testing to ensure proper adhesion and durability before vehicles ship. This is why properly installed and removed PPF virtually never damages factory paint. The paint system is simply too durable. When Paint Damage Can Occur While rare on factory paint, certain conditions increase damage risk during PPF removal. Aftermarket Paint Jobs Repainted vehicles face significantly higher risk during PPF removal. Why Aftermarket Paint Is Vulnerable: Inadequate curing: Body shops often return vehicles within days of painting. Full paint cure can require 30 to 90 days. PPF installed over incompletely cured paint bonds too strongly. Improper surface preparation: Rushed prep work can leave contaminants or inadequate adhesion between paint layers. Thinner clear coat: Some repaints use thinner clear coat than factory specifications to save material costs. Inconsistent application: Hand-applied paint has thickness variations. Thin spots are vulnerable to damage. Lower temperature curing: Most body shops cure paint at lower temperatures than factory ovens, resulting in softer, less durable finish. The result: when PPF is removed from aftermarket paint, there’s genuine risk of pulling paint layers with the film. Extremely Old or Low-Quality Film Bargain PPF products use inferior adhesives that can bond too strongly over time. Problem Films: Generic or off-brand PPF without manufacturer testing.
Can You Apply Ceramic Coating to Plastic Trim, Wheels, or Glass?

Quick Answer Yes, you can apply ceramic coating to plastic trim, wheels, and glass, but each surface requires a specific formulation. Paint-grade ceramic coatings are designed for clear coat and should not be used interchangeably on all surfaces. Trim-specific coatings withstand flexibility and restore faded plastic with 4H hardness and protection up to 24 months. Wheel coatings resist temperatures up to 350°C (662°F) from brake heat. Glass coatings bond differently to non-porous surfaces and prevent wiper chatter that generic coatings cause. Using the correct coating for each surface ensures proper bonding, longevity, and performance. Vehicle owners exploring ceramic coating options often wonder if this protection extends beyond paint. Modern vehicles feature extensive plastic trim, alloy wheels, and glass surfaces that all face environmental damage. The good news is ceramic coating technology isn’t limited to painted panels. The critical factor is understanding that different surfaces have different molecular structures, temperatures, and flexibility requirements. This guide breaks down exactly how ceramic coating works on plastic trim, wheels, and glass, what products to use, and why surface-specific formulations matter. Understanding Ceramic Coating Chemistry for Different Surfaces Ceramic coating consists primarily of silicon dioxide (SiO2), also called silica or quartz. When applied, these nano-particles create a chemical bond with the surface, forming a protective layer typically 2 to 7 microns thick. Why One Coating Doesn’t Fit All Surfaces Molecular Bonding Differences: Paint and clear coat have a porous, slightly flexible surface that allows SiO2 particles to penetrate and bond mechanically and chemically. Glass is non-porous and extremely hard. Coatings designed for paint don’t bond as effectively because glass lacks the microscopic texture that mechanical bonding requires. Plastic trim, especially textured black trim, is semi-flexible and can expand and contract with temperature changes. Rigid paint coatings can crack or delaminate on flexible surfaces. Wheels endure extreme temperatures from brake systems, sometimes exceeding 350°C (662°F) during hard braking. Standard paint coatings aren’t formulated to withstand this heat. Surface-Specific Formulations Paint Coatings: Trim Coatings: Wheel Coatings: Glass Coatings: Ceramic Coating for Plastic Trim Plastic trim includes bumpers, side moldings, mirror housings, door handles, windshield cowls, fender flares, and bed rails on trucks. Why Plastic Trim Needs Protection UV Damage: Prolonged sun exposure breaks down plastic polymers, causing fading and that characteristic gray or chalky appearance. Oxidation: Exposure to oxygen and environmental contaminants creates a dull, lifeless finish. Staining: Road tar, tree sap, and other contaminants bond to unprotected plastic, creating permanent discoloration. Cracking: Dried, damaged plastic becomes brittle and develops surface cracks. Can You Use Paint Coating on Plastic Trim? Technically yes, but it’s not ideal. Paint-grade ceramic coatings will bond to hard, smooth plastic surfaces like smooth bumpers, mirror housings, and glossy trim pieces. Problems with Paint Coatings on Plastic: Too rigid: Paint coatings are formulated for inflexible clear coat. When applied to semi-flexible plastic that expands and contracts with temperature, the coating can crack or peel. Wrong finish: Paint coatings create a high-gloss finish. Most textured black trim looks unnatural with excessive gloss. No color restoration: Paint coatings are transparent and add no pigment. They preserve whatever condition the plastic is in but won’t restore faded trim. Poor penetration on textured surfaces: Paint coatings don’t adequately penetrate the valleys and texture of rougher plastic, leading to uneven protection. Trim-Specific Ceramic Coating Benefits Proper trim coatings deliver specific advantages: Color Restoration: Trim coatings contain mild pigments or oils that restore the deep black color of faded plastic. This isn’t a temporary dressing that washes off but a bonded layer that maintains color. Satin Finish: Instead of high gloss, trim coatings provide a natural satin finish that matches factory appearance. Flexibility: Formulated with slightly more elastic properties to accommodate plastic movement without cracking. UV Protection: Specialized UV inhibitors prevent future fading. Protection typically lasts 18 to 24 months. Hydrophobic Properties: Water and contaminants bead off, making trim easier to clean and preventing staining. Application Process for Plastic Trim Surface Preparation: Application Technique: Apply 2 to 3 drops of trim coating to a microfiber applicator or included sponge. Work in small sections, approximately 12 x 12 inches at a time. For Textured Trim: Apply using a back-and-forth motion, working the coating into all texture and crevices. Do not wipe off on textured surfaces. Apply evenly and leave to cure. The coating will self-level in the texture. For Smooth Trim: Apply a thin, even layer. After 1 to 2 minutes, when the coating begins to flash (appears slightly hazy), buff gently with a clean microfiber towel. This creates a thinner layer that still provides protection but without excessive buildup on smooth surfaces. Curing Time: Avoid moisture exposure for 12 hours minimum. Wait 48 hours before washing the vehicle. Which Trim Pieces to Coat Best Candidates: Avoid Coating: Trim Coating Longevity With proper application and maintenance: Ceramic Coating for Wheels Wheels face some of the harshest conditions on your vehicle: extreme temperatures, corrosive brake dust, road salt, tar, and constant bombardment from road debris. Why Wheels Need Specialized Coating Brake Dust: Comprised of carbon fibers, adhesives, and metal particles that stick aggressively to wheel surfaces. Contains iron particles that embed into pores and cause staining and corrosion. High Temperatures: During heavy braking, wheels can reach 350 to 600°F. Track use or performance driving can push temperatures even higher. Diverse Materials: Modern wheels come in painted finishes, powder coating, polished aluminum, chrome, machined surfaces, and bare metal. Each requires slightly different treatment. Time-Consuming Cleaning: Intricate wheel designs with spokes, vents, and tight spaces make thorough cleaning labor-intensive without protection. Heat Resistance Requirements Standard paint ceramic coatings typically withstand up to 500°F. This is insufficient for wheels. Wheel-Specific Coatings Heat Tolerance: This heat resistance prevents coating breakdown, yellowing, or delamination from brake system heat. Can You Use Paint Coating on Wheels? Professional ceramic coatings formulated for automotive paint will work on wheels for normal street driving where brake temperatures stay moderate. When Paint Coating Works on Wheels: When You Need Wheel-Specific Coating: The consequences of using inadequate coating are yellowing, hazing,
Can Ceramic Coating Be Applied Over Swirl Marks or Scratches?

Quick Answer Technically yes, ceramic coating can be applied over swirl marks and scratches, but you should not do this. Ceramic coating is only 2 to 6 microns thin and completely transparent. It follows the exact contours of your paint surface, which means it amplifies and highlights existing imperfections rather than hiding them. Paint correction must be performed before ceramic coating application to remove swirl marks and scratches. Applying coating over damaged paint permanently seals the flaws in and makes them more visible. Vehicle owners considering ceramic coating often ask whether they need to fix existing paint imperfections first. The marketing surrounding ceramic products sometimes suggests these coatings can fill minor scratches or mask swirl marks. This creates confusion about whether paint correction is truly necessary before coating application. The reality is straightforward but often misunderstood. This guide explains why paint condition matters so much, what happens when you coat over imperfections, and the proper process for achieving the glossy, protected finish ceramic coating promises. Understanding What Ceramic Coating Actually Does Before discussing swirl marks and scratches, you need to understand how ceramic coating actually works. Ceramic Coating Composition Ceramic coating is a liquid polymer primarily composed of silicon dioxide (SiO2), also called silica or quartz. When applied to automotive paint, the formula chemically bonds with the clear coat through a curing process. Physical Properties: The coating creates a semi-permanent protective layer that bonds at the molecular level to your clear coat. This is fundamentally different from wax or sealant, which sit on top of the paint without chemical bonding. What Ceramic Coating Protects Against Ceramic coating provides excellent defense against specific types of damage: Environmental Protection: What It Does NOT Protect: The coating serves as a sacrificial layer, designed to absorb minor damage so your paint doesn’t have to. This protection only works when applied over paint in good condition. The Truth About Coating Over Imperfections Here’s the critical fact many people misunderstand: ceramic coating does not fill, hide, or repair scratches and swirl marks. It makes them more visible. The Magnifying Effect Ceramic coating creates what professionals call the “magnifying effect” or “highlighting effect.” Why This Happens: The coating is completely transparent with no fillers or light-diffusing agents. When you apply it over scratched or swirled paint, the coating simply follows the exact topography of the damaged surface. Because the cured coating has a glass-like, glossy finish, it actually enhances surface reflection, which makes every imperfection stand out more dramatically under light. Think of it like applying a clear gloss varnish over a scratched wooden table. The varnish doesn’t hide the scratches. Instead, the added gloss and reflection make them easier to see. What Happens to Swirl Marks Under Coating Swirl marks are fine circular scratches in the clear coat, typically caused by: When ceramic coating is applied over swirl marks: The nano-particles do seep into the scratches because ceramic coating is liquid during application. This creates the false perception that it “fills” the damage. But when it cures, the coating only forms a smooth layer following the scratch pattern. The swirl marks remain visible in the paint below. Because the coating adds gloss, these marks actually become more apparent under direct light, especially sunlight. The swirls are now sealed under a hard protective layer, making future correction significantly harder. You’ll need to remove or polish through the ceramic coating before you can access the damaged clear coat underneath. Deep Scratches Remain Completely Visible For scratches you can feel with your fingernail: Ceramic coating provides zero visual improvement. These scratches penetrate too deep into the clear coat for any coating to mask. The coating simply bridges over the top of the scratch, leaving a visible groove in the surface. Some people hope the coating will “level” or “fill” deep scratches through surface tension. This doesn’t happen. The coating is too thin (2 to 6 microns) to fill any scratch deep enough to be visible. Why Paint Correction is Essential Before Coating Professional ceramic coating application always includes paint correction as a mandatory preparation step. What Paint Correction Accomplishes Paint correction is a precise process using abrasive polishes and machine polishers to remove a very thin layer of clear coat. The Process: Polishing compounds contain microscopic abrasives that cut away damaged clear coat until the surface of the scratch is level with the surrounding paint. This is called “leveling.” The removed clear coat is redistributed as residue that fills remaining micro-imperfections. With proper technique, this creates an almost perfectly smooth surface. Different polishing compounds and pad combinations handle different severity levels: Paint Thickness Considerations Clear coat thickness limits how much correction is possible. Most factory clear coat measures 40 to 60 microns thick, though luxury vehicles may have 70 to 100 microns. Safe Correction Levels: Professional detailers use paint thickness gauges to measure clear coat depth before correction. This prevents accidentally polishing through to the base coat color layer. The Proper Preparation Sequence Professional ceramic coating application follows a specific preparation sequence: Step Process Purpose Time Required 1. Decontamination Wash Thorough wash with pH-neutral soap Remove loose dirt and grime 30-60 min 2. Clay Bar Treatment Clay medium pulls bonded contaminants Remove embedded particles 45-90 min 3. Paint Thickness Measurement Gauge reading on multiple panels Establish safe correction limits 15-30 min 4. Paint Correction Machine polishing with compounds Remove scratches and swirls 4-12 hours 5. IPA Panel Wipe Isopropyl alcohol removes polish oils Ensure clean bonding surface 15-30 min 6. Ceramic Application Coating applied in small sections Create protective layer 2-6 hours 7. Curing Product cures to full hardness Bond to clear coat 24-48 hours This entire process typically requires 8 to 20 hours of labor, depending on vehicle size and paint condition. What Happens If You Skip Paint Correction Some vehicle owners attempt to save money or time by applying ceramic coating over damaged paint. This creates several problems. Permanent Flaw Preservation Once ceramic coating cures over scratched or swirled paint, those imperfections become essentially permanent to
Does Window Tint Help Keep Your Car Cooler in San Antonio Summers?
Quick Answer Yes, window tint significantly reduces car interior temperature in San Antonio summers. Quality window tint can lower cabin temperature by 8 to 20 degrees Fahrenheit, depending on film type. Ceramic tint blocks up to 85% of infrared heat and 99% of UV rays. With San Antonio summer averages reaching 90 to 96 degrees Fahrenheit, and often exceeding 100 degrees for 22+ days per summer, tinted windows provide measurable cooling benefits that reduce air conditioning strain, protect interiors, and improve driving comfort. San Antonio summers are intense. When temperatures routinely climb into the mid-90s and frequently break 100 degrees, your car becomes a rolling oven within minutes of parking. If you’ve experienced that blast of scorching air when opening your car door after grocery shopping, you know the problem well. The question many San Antonio vehicle owners ask is whether window tinting actually provides meaningful cooling relief, or if it’s just a cosmetic upgrade with minor side benefits. The science and real-world data prove that quality window tint dramatically reduces interior heat. This guide explores exactly how much cooler your car will be, which tint types perform best in San Antonio’s climate, and what the actual temperature differences mean for your daily driving experience. Understanding San Antonio’s Summer Heat Challenge To appreciate window tint’s cooling impact, you need to understand what you’re up against in San Antonio’s summer climate. The Numbers Behind San Antonio Summers San Antonio experiences some of the most intense sustained heat in Texas: Average Summer Temperatures: Extreme Heat Days: Record-Breaking Patterns: What Happens Inside Your Car The greenhouse effect inside vehicles amplifies external temperatures dramatically. Here’s what the science shows: Without Window Tint: Heat Buildup Timeline: Why Cars Get So Hot: This greenhouse effect makes untinted vehicles uncomfortable and potentially dangerous, especially for children, pets, or anyone with heat sensitivity. How Window Tint Reduces Heat: The Science Window tint doesn’t just darken your windows. It actively blocks the specific types of solar energy responsible for heat buildup. The Three Types of Solar Energy Sunlight reaching your car contains three distinct energy types: Visible Light (44% of solar energy): Infrared Radiation (53% of solar energy): Ultraviolet Radiation (3% of solar energy): Quality window tint targets infrared and ultraviolet radiation while allowing varying amounts of visible light through, depending on darkness level. How Different Tint Types Block Heat Not all window films perform equally. The material composition determines heat rejection capabilities. Tint Type Infrared Rejection UV Rejection Heat Reduction Durability Dyed Film 15-25% 40-60% Minimal Fades over time Carbon Film 40-50% 70-80% Moderate (12-15°F) Good (5-7 years) Ceramic Film 50-85% 99% Excellent (15-20°F) Superior (10+ years) Metalized Film 60-70% 90-95% Good Interferes with signals Why Ceramic Performs Best: Ceramic tint uses nano-ceramic particle technology that doesn’t rely on dyes or metals. These microscopic particles specifically target and reflect infrared radiation while maintaining excellent visible light transmission. This means you can have lighter tint shades that still provide exceptional heat rejection. Ceramic films maintain their performance over time because ceramic particles don’t break down from UV exposure like dyes do. Unlike lower-quality dyed films that turn purple and bubble, ceramic tint retains its original appearance and heat-blocking properties for the film’s entire lifespan. The Role of Visible Light Transmission Visible Light Transmission (VLT) percentage indicates how much light passes through tinted windows. Lower VLT means darker tint. Common VLT Levels: Important Clarification: Darker tint doesn’t necessarily mean better heat rejection. A 70% ceramic tint can block more heat than a 5% dyed tint because infrared rejection depends on material technology, not darkness. Texas law requires front side windows to allow more than 25% light transmission, but rear windows and back glass have no restrictions for passenger vehicles. Actual Temperature Reduction: The Data Real-world testing and scientific studies provide concrete numbers on window tint’s cooling performance. Temperature Drop Studies Multiple research projects have measured interior temperature differences: University Studies: Industry Testing: Measured Results by Tint Type: No Tint: Interior reaches 130 to 140 degrees Fahrenheit Dyed Film: Interior reaches 125 to 130 degrees Fahrenheit (5 to 10 degree reduction) Carbon Film: Interior reaches 115 to 120 degrees Fahrenheit (12 to 15 degree reduction) Ceramic Film: Interior reaches 110 to 115 degrees Fahrenheit (15 to 20 degree reduction) Premium Ceramic Film: Interior reaches 105 to 110 degrees Fahrenheit (up to 20+ degree reduction) Heat Rejection Capabilities Beyond absolute temperature numbers, heat rejection percentages indicate how much solar energy is blocked: Total Solar Energy Rejection (TSER): What This Means in San Antonio: On a 100-degree day with your car parked in the sun, ceramic tint blocking 60% of total solar energy means: Surface Temperature Differences Window tint doesn’t just cool the air. It keeps surfaces cooler: Dashboard Temperatures: Steering Wheel: Leather Seats: These surface temperature reductions make immediate practical differences when entering your vehicle. Real-World Impact on San Antonio Driving Temperature numbers and percentages matter, but what do they mean for your daily experience? Morning Commute Scenario Without Tint: Your car sits in the driveway from 7 AM to 5 PM on a typical San Antonio summer day (95 degrees exterior). With Ceramic Tint: Same parking scenario. Time Savings: 5 to 8 minutes less cooling time per entry Daily Benefit: If you enter your car 4 times daily, that’s 20 to 32 minutes saved running AC at maximum Monthly Impact: 10 to 16 hours less maximum AC operation Weekend Errands Running Saturday errands means multiple short stops at different locations. Without Tint: With Ceramic Tint: Long-Term Benefits Beyond immediate comfort, window tint provides ongoing advantages in San Antonio’s climate: Interior Preservation: Health Protection: Energy Efficiency: Resale Value: Choosing the Right Tint for San Antonio With San Antonio’s extreme heat, selecting appropriate window film becomes crucial. Ceramic Tint: The San Antonio Standard For maximum heat rejection in San Antonio’s climate, ceramic tint represents the best value despite higher initial investment. Why Ceramic Wins in Hot Climates: Superior Infrared Rejection: Blocks 50-85% of infrared heat, the primary heat source. In 100-degree San
Can You Wash and Wax a Car With PPF? Proper Care Guidelines
Quick Answer Yes, you can wash and wax a car with paint protection film. Wait 48 to 72 hours after installation before the first wash. Use pH-neutral soap, soft microfiber mitts, and the two-bucket method. Waxing is optional with modern PPF but can add extra gloss and protection. If waxing, use products without kerosene, naphtha (over 5%), dyes, or abrasives. Wash every 2 weeks for daily drivers and wax 1 to 2 times per year if desired. Investing in paint protection film for your vehicle represents a significant commitment to preserving your car’s appearance. Once installed, a natural question arises: how do you maintain it? Can you wash it like regular paint? What about waxing? This guide answers these questions and provides detailed care instructions to help your PPF stay in perfect condition for years. Understanding Paint Protection Film Care Requirements Paint protection film is engineered from thermoplastic urethane, a durable yet flexible material designed to absorb impacts and resist environmental damage. Despite its strength, PPF requires specific care practices that differ slightly from maintaining bare paint. Modern PPF comes with built-in properties that make maintenance easier than ever: Hydrophobic Surface: Quality PPF naturally repels water, causing it to bead up and roll off the surface. This property reduces water spotting and makes washing more effective. Self-Healing Technology: High-end films can repair minor scratches and swirl marks when exposed to heat. This feature maintains the smooth, glossy appearance without manual intervention. Stain Resistance: The film’s smooth surface prevents contaminants like bird droppings, tree sap, and bug splatter from bonding as strongly as they would to bare paint. UV Stability: Premium PPF resists yellowing and degradation from ultraviolet exposure, maintaining optical clarity throughout its lifespan. Can You Wash a Car With Paint Protection Film? Absolutely. Regular washing is not just safe for PPF, it’s essential for maintaining the film’s protective properties and appearance. Dirt, grime, and environmental contaminants that accumulate on the surface can gradually degrade the film if left unattended. When to Start Washing After Installation The most critical consideration is timing your first wash after PPF installation. The adhesive needs adequate time to cure fully before exposing it to water and washing products. Minimum Wait Time: 48 hours for light washing Recommended Wait Time: 72 hours for standard washing Optimal Wait Time: 7 days before intensive cleaning Most professional installers recommend waiting at least 48 hours, though 72 hours provides a safer margin. During this curing period, the film bonds completely to the paint surface, ensuring edges remain sealed and the adhesive reaches maximum strength. How Often Should You Wash PPF? Washing frequency depends on your driving conditions and environment: Daily Drivers: Every 2 weeks minimum Highway Commuters: Every 1 to 2 weeks (more bug and road debris exposure) Garage-Kept Weekend Cars: Once per month or as needed Vehicles in Harsh Climates: Every 1 to 2 weeks (high UV, salt, or industrial fallout) Regular washing prevents contaminant buildup that can etch into the film or create staining. In San Antonio’s climate, the intense sun and occasional dust storms make biweekly washing particularly important for daily drivers. Proper PPF Washing Technique The washing method you use significantly impacts PPF longevity and appearance. Following the right technique prevents accidental damage while effectively cleaning the surface. Required Supplies Item Specification Purpose Car Shampoo pH-neutral, wax-free Gentle cleaning without residue Wash Mitts Soft microfiber, 2 required Prevents scratching, one for wheels Buckets 2 large buckets with grit guards Two-bucket method execution Drying Towels Premium microfiber, waffle weave Water removal without marring Wheel Cleaner pH-neutral, non-acidic Safe for PPF overspray Hose or Pressure Washer Pressure washer: 1,200 to 1,900 PSI Pre-rinse and final rinse The Two-Bucket Method This proven technique minimizes the risk of scratching by keeping your wash mitt clean: Bucket 1 (Wash Bucket): Fill with water and pH-neutral car shampoo according to product instructions. Bucket 2 (Rinse Bucket): Fill with clean water only. Add a grit guard to the bottom if available. Process: This method prevents dirt particles from being reintroduced to the wash solution, which would then scratch the PPF as you clean. Step-by-Step Washing Process 1. Pre-Rinse (5 minutes) Thoroughly rinse the entire vehicle to remove loose dirt, dust, and debris. This step is crucial because it eliminates particles that could scratch during the contact wash. If using a pressure washer, maintain these guidelines: 2. Wheels First (10 minutes) Clean wheels before the body to prevent splashing brake dust and road grime onto clean paint. 3. Body Washing (15 to 20 minutes) Work from top to bottom in sections: Technique Notes: 4. Final Rinse (5 minutes) Remove all soap residue with a thorough rinse: 5. Drying (10 to 15 minutes) Proper drying prevents water spots, especially in San Antonio’s hard water areas: Best Method: Use a premium waffle-weave microfiber drying towel. Pat and glide across surfaces rather than rubbing vigorously. Alternative Method: Use a car blower or leaf blower to remove water without touching the surface. This touchless method is ideal for maximizing PPF longevity. Avoid: Chamois or traditional towels, which can trap particles and create scratches. What to Avoid When Washing PPF Automatic Brush Car Washes: Stiff rotating brushes can lift film edges, create scratches, and gradually damage the surface. The harsh chemicals used in many automatic washes can also degrade PPF properties. Harsh Chemicals: Avoid cleaners containing: Abrasive Tools: Never use: Dirty Mitts: Always keep your wash mitt clean. A single piece of grit can create scratches across an entire panel if dragged through the washing process. Hot Water: Excessively hot water can affect adhesive properties, especially along edges. Use cool to lukewarm water for washing. Can You Wax a Car With Paint Protection Film? Yes, you can apply wax over PPF, but it’s not always necessary. Modern paint protection films, especially high-quality products, already feature hydrophobic top coats that provide many of the benefits traditionally achieved through waxing. Understanding When Waxing Makes Sense Situations Where Waxing Helps: Enhanced Gloss: If you want maximum shine and depth
